whatsapp:8615165139199
mail:lilysun2617188@gmail.com
address:No.16, Ren Mei Road, National Hi-tech Industrial Development Zone, Jining City, Shandong Province, China.
Hydraulic cylinders are vital in various machines, from construction equipment to industrial systems. Over time, seals can wear out, causing leaks and performance issues. Replacing these seals is crucial to keep your hydraulic systems running efficiently. In this article, we'll guide you through the process of replacing hydraulic cylinder seals, ensuring proper maintenance and long-lasting performance.
Understanding Hydraulic Cylinder Seals
Importance of Hydraulic Cylinder Seals
Hydraulic cylinder seals are responsible for preventing hydraulic fluid from leaking and protecting the cylinder from contaminants such as dirt, moisture, and debris. These seals play a critical role in maintaining the pressure required for smooth operation. Without them, hydraulic systems would not function properly, leading to a loss of power and efficiency. Over time, exposure to high pressures and constant motion can cause these seals to wear out, allowing fluid to leak and contaminants to enter the system.
When the seals degrade, it can lead to a drop in pressure, which directly impacts the performance of your hydraulic systems. This degradation may result in sluggish or erratic movement of the machinery, which can be costly in terms of both repair and downtime.
Why Replacing Seals is Crucial
Worn or damaged seals are the leading cause of leaks in hydraulic cylinders. If left untreated, these leaks can cause severe damage to the cylinder’s internal components, such as the piston, rod, or the cylinder barrel. Additionally, a leaking cylinder will fail to perform at its optimal capacity, which can lead to higher operational costs and system inefficiencies.
By replacing the seals regularly, you not only ensure the smooth operation of your hydraulic systems but also prevent the possibility of internal damage, which can require costly repairs or a complete cylinder replacement. Regular seal replacements improve the efficiency and safety of your hydraulic systems, ensuring your equipment lasts longer and operates more effectively.
Overview of the Process
Replacing hydraulic cylinder seals may sound complicated, but with the right tools, knowledge, and preparation, the task becomes manageable. This guide outlines the essential steps for replacing the seals, from preparation and disassembly to seal installation and reassembly. By following these steps, you can restore the performance of your hydraulic cylinders while saving time and money on repairs.
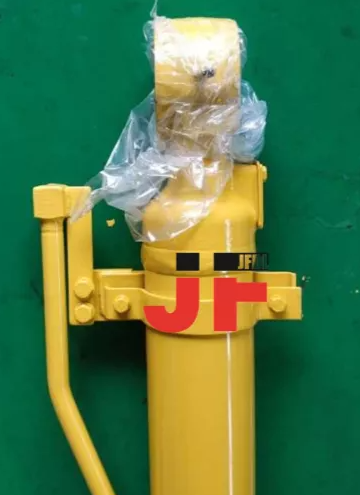
Hydraulic Cylinder
Preparation for Hydraulic Cylinder Seal Replacement
Before diving into the seal replacement process, it’s crucial to prepare your work area and gather all the necessary tools and materials. A well-prepared workspace will ensure the repair process goes smoothly and efficiently.
Gather Necessary Tools and Materials
To successfully replace hydraulic cylinder seals, you’ll need the following tools and materials:
Wrenches and socket set for disassembling components and removing bolts.
Screwdrivers and seal pick to carefully remove old seals without damaging the cylinder.
Hydraulic cylinder seal kit that is specific to your cylinder model. This kit should include the appropriate replacement seals.
Lubricants that are compatible with hydraulic systems to prevent damage during the installation of the new seals.
Safety gear, including gloves and goggles, to protect yourself from hydraulic fluid and sharp edges.
Having the correct tools will not only make the job easier but also prevent delays due to missing or incorrect equipment.
Understand Your Hydraulic Cylinder Model
Each hydraulic cylinder may have different types of seals based on its design. It’s important to identify your cylinder model and understand the type of seals it requires. Common types of hydraulic cylinders include:
Once you know your cylinder’s model and type, you can order the correct seal kit. Always check the manufacturer's details for the exact seal requirements. This will ensure you avoid using the wrong seals, which can cause leaks and other operational issues.
Clean the Work Area
A clean workspace is essential when replacing hydraulic cylinder seals. Contaminants such as dust, dirt, and oil can damage the new seals or compromise their installation. Ensure that your work area is free from dirt and other debris, and that you have enough space to work comfortably. If working in an industrial setting, use tarps or clean mats to prevent contamination.
Step 1 – Removing the Hydraulic Cylinder
Isolate the Hydraulic System
Before you begin working on the hydraulic cylinder, it’s essential to depressurize the hydraulic system. This step eliminates any fluid pressure that could cause the system to discharge hydraulic fluid unexpectedly, preventing accidents and ensuring safe repairs.
Make sure that the system is isolated from any power sources and hydraulic pressure is released. If the system cannot be depressurized easily, consult the manufacturer’s manual for specific instructions.
Disconnect the Cylinder from Equipment
Once the system is depressurized, you can begin disconnecting the hydraulic cylinder from the equipment. Follow these steps:
Label all hydraulic hoses and components to ensure proper reassembly.
Detach hoses carefully to avoid any damage to the hydraulic pipes.
Remove any mounting pins or bolts that secure the cylinder to the equipment.
Ensure that the equipment is turned off and disconnected from any electrical or mechanical sources of power.
Remove the Cylinder from the Equipment
After disconnecting the cylinder from all hoses and mounting components, carefully remove the cylinder from the equipment. Make sure the cylinder is properly supported during removal to prevent it from falling and causing injury or equipment damage. Use a hoist or hydraulic lift if necessary to ensure proper handling of the cylinder.
Step 2 – Disassembling the Hydraulic Cylinder
Removing External Components
Now that the hydraulic cylinder is removed from the equipment, it’s time to disassemble the cylinder. If the cylinder uses wire rings, you will need to remove the external wire rings carefully. If it’s a threaded gland cylinder, you’ll need to unscrew the end cap. Be cautious while removing these components to avoid damaging the internal parts of the cylinder.
Inspecting for Damage
After disassembling the cylinder, perform a thorough inspection of the internal components:
Inspect the piston rod for any signs of damage such as scratches, pitting, or bending.
Check the rod seals for uneven wear, which may indicate misalignment or excessive loading.
Feel inside the cylinder barrel to ensure it is smooth and free from any corrosion or scoring.
If any of the internal components show signs of wear, replace them before proceeding with seal replacement.
Pay Attention to Seal Positioning
When removing the old seals, make a note of their orientation. Take careful measurements of their positioning to ensure the new seals are installed in the exact same way. Clean the grooves where the seals were placed to ensure there are no remnants of old seal material or contaminants that could affect the new seals.
Step 3 – Replacing the Seals
Clean the Cylinder Components
Once the old seals are removed, it’s crucial to clean the piston, rod, and cylinder barrel thoroughly. Use a cleaning solution and clean rags to remove any residual oil, dirt, or old seal residue. A clean surface ensures that the new seals will fit snugly and function properly.
Lubricate and Install New Seals
Before installing the new seals, it’s important to lubricate them with hydraulic-compatible fluid. Lubrication reduces friction and helps the seals slide into their grooves without damaging them. Carefully insert each new seal into its respective groove, ensuring that it is fully seated.
Reassemble the Cylinder Components
Once the seals are in place, begin reassembling the cylinder. Carefully reinstall the piston and rod assembly, making sure everything is aligned properly. Reattach the gland or end cap, ensuring it is securely tightened.
Step 4 – Reinstalling the Hydraulic Cylinder
Reinstall Cylinder onto Equipment
Once the cylinder is reassembled, reattach it to the equipment. Carefully align the cylinder with the mounting points and secure it in place. Ensure all connections are secure to prevent any movement during operation.
Reconnect Hydraulic Hoses
After the cylinder is securely reinstalled, reconnect the hydraulic hoses to the correct ports. Double-check the connections to ensure they are tight and there is no risk of leaks when the system is pressurized.
Hydraulic Cylinder
Step 5 – Testing the Hydraulic Cylinder
Check for Leaks
Once the hydraulic cylinder is reinstalled and the hoses are reconnected, it’s time to test for leaks. Pressurize the system and check for any signs of hydraulic fluid leakage around the seals and hoses. If there are leaks, shut the system down and check the seal placement again.
Monitor Cylinder Performance
With the system pressurized, run the hydraulic cylinder through its full range of motion to ensure it functions correctly. Monitor the cylinder’s performance and listen for any unusual sounds that may indicate improper operation. Testing the system ensures that the new seals are working as expected and that the cylinder operates efficiently.
Conclusion
Replacing hydraulic cylinder seals is a straightforward process when done correctly. By following proper steps and using the right tools, you can restore hydraulic cylinder performance. Regular maintenance and timely seal replacements extend the lifespan of hydraulic systems, avoiding costly repairs.
For optimal performance, ensure regular inspections and always use high-quality seals compatible with your cylinder model. Also, check for other issues like rod damage before replacing seals to prevent further complications.
At Qianyu, we offer high-quality hydraulic components designed for durability and efficiency, ensuring long-term performance for your systems.